

We stopped buying tissues years ago. I’m not sure exactly when but it was probably in the first wave of belt tightening that hit us about 7 years ago. We have used bits of t-shirt, real cloth hankies bought in shops or any old bit of something that already looked dirty and a bit of snot wouldn’t make any worse.
When I got the overlocker I started overlocking the edges of squares of upcycled t-shirts to differentiate them from other bits of cloth that were not for noses to be blown on.
Then last winter I bought a lovely thick cotton tablecloth from a jumble sale and sewed Mr G some big old hankies from it for his Christmas present. The edges of these are a bit hit and miss and the corners are lumpy, not perfectly square and were tricky to sew but he loved them and hasn’t lost any of them through using them to wipe the car windscreen or wipe up spilled drinks.
After this sewing adventure I found book in the library which I can’t remember the title of but it had a very simple way to sew neat corners on anything square that needs hemming. I remembered it for future reference and remembered to take the book back to the library too.
Last winter Mr G wrecked one of his favourite shirts by taking it off over his head without undoing the buttons….. and without taking his jumper off either….. and it ended up in the pile of things to be made into other things, destined to become a dress or a skirt or a lining or something.
I found it again last week and due to a further bout of familial snottiness I heard new hankies calling me. No lumpy corners here, no, perfect mitred corners. I share this easy way to do them with you and I wish you many happy mitred corners of hankies or tablecloths or blankets or whatever you choose to sew.
First fold up the corner of your fabric like so (about two fingers’ width)

Press this fold with your fingers or an iron if you can be bothered. (I did iron it but on a towel on the floor not the ironing board because I am lazy-ish) Open it up again and fold one edge of the thing to meet the edge next to it to make a point. Now you will only be able to see half of your fold.

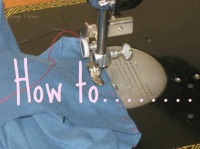
Sew along this fold from the folded side to the open edge and cut off the point

Now turn it inside out and you will see a lovely mitred corner

Do the same for the other three corners.
To finish, you need to loosen the stitches on each corner closest to the raw edge, turn under a little bit of fabric and pin it.

Sew along this new folded over edge and ……..Ta Da! One sturdy mitred cornered thingie.

ETA If you want a narrower hem: sew only 6 stitches along the first fold. This enables you to turn the raw edge under further to make a narrower hem.
